

You are here: Nature Science Photography – Image creation, Depth and Size – Photographic size mapping
Now that we’ve „manipulated“ enough, we’re ready to explore how we can represent the proportions based on our perception. – In the beginning, I mentioned that photography allows us to accomplish both tasks. To do this, we must consider two factors: the angle of view and the viewing distance.
The angle of view Bα is the size of the field imaged by the lens on the film and we distinguish the horizontal angle of view, the vertical angle of view and the diagonal angle of view as shown in figure 74 (Image angles):
It is calculated with the tangent function as follows (formula 15):

For „Format“, we set the horizontal, vertical or diagonal dimension corresponding to the respective recording format (see following table).
| Format | Horizontal angle of view | Vertical angle of view | Diagonal angle of view |
| Four-Thirds/ Micro Four-Thirds | 17,3 mm | 13 mm | 24,6 mm |
| APS-C | 24 mm | 16 mm | 28,8 |
| 24×36 KB | 36 mm | 24 mm | 43,3 mm |
| 6×6 | 60 mm | 60 mm | 84,8 mm |
| 4“x5“ | 127 mm | 101,6 mm | 162,6 mm |
| 8“x10“ | 254 mm | 203,2 mm | 325,3 mm |
The diagonal is calculated according to the formula 16:

d = diagonal
b = image width
h= image height
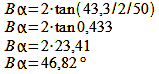
For the diagonal 35 mm format and 50 mm focal length, it calculates like this (formula 17):
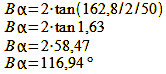
With the diagonal 4 „x5“ format and also 50 mm focal length, it looks like this (formula 18):
I see, so the angle of view increases as the format size increases and the focal length remains the same. The 50 mm, which is a normal focal length in 35 mm, becomes a respectable wide angle in large format.
figure 75 (Angle of view and image format) illustrates this.
At this juncture, we can also clarify a frequently misinterpreted connection. A lens with a given focal length, e.g., 50 mm, always images an object, e.g., a car, in the same size, regardless of whether it is on 35 mm material or on 4×5″ sheet film. The only difference is that on the 35 mm film, only a part of the car, perhaps the center piece, will be visible, whereas on the large format, it will appear whole with a good bit of its surroundings. But if we superimpose both films, the parts depicted in each case correspond. The figure 75 (Angle of view and image format) illustrates why this is so. The angle of view indicates how much of the object fits on the image. In the first example, the image format cannot fully accommodate the arrow acting as the subject. The dashed lines lead from the outermost points of the image plane to the outermost representable points of the arrow. They form the image angle. In the second example with a larger image format, it can be accommodated completely.
For us humans, the angle of view in all directions (our field of view is almost circular) is a good 50°. According to the relevant definition, this is the area that can be seen well without moving the head but with movement of the eyes. In order to produce an image that corresponds to what we can perceive „at a glance“, so to speak, we must use a lens that images an angle of view of 50° in the respective image format. In 35 mm format, this angle of view corresponds to a focal length of 50 mm. Images taken with such lenses, at normal magnification and correct viewing distance, correspond pretty much to what we can perceive at a glance. This is why we refer to such lenses as „normal lenses.“ But what is the „correct viewing distance“ that brings the proportions back into line with our perception? It can also be calculated. The formula is formula 19:
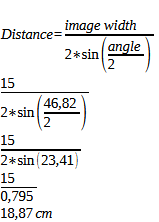
An image taken with a 50 mm focal length (=46.82° diagonal angle of view) and enlarged to 10 x 15 cm must therefore be viewed from a distance of a good 19 cm so that it again occupies around 50° of our image field. Of course, we can also calculate the correct distance for any image taken with a different focal length this way. For a few common 35 mm focal lengths, I’ll do the work for you:
| Focal length (35mm format) | Diagonal angle of view | Viewing distance |
| 24 mm | 84,1° | 11 cm |
| 35 mm | 63,5° | 14 cm |
| 100 mm | 24,4° | 35 cm |
| 200 mm | 12,3° | 70 cm |
To determine the respective focal length for the usually smaller digital shooting formats, divide the given focal length by the factor corresponding to your shooting format: Four-Thirds (1.6), APS-C (1.4), APS (1.5), 4/3″ (1.9), 2/3″ (3.9), 1/1.6″ (4.2), 1/1.7″ (4.6), 1/1.8″ (4.8), 1/2.3″ (5.6), 1/2.5″ (6.0), 1/2.7″ (6.5), 1/3.2″ (10.2)
As far as the previously mentioned moon illusion is concerned, the camera is immune to the peculiarities of our perception system and often surprises us with images that show a much smaller moon than we remember. Since the moon and the horizon are equally located at infinity, the perspective foreshortening that causes the size distortion does not come into play in this case, and only a focal length of at least 200 mm renders the earth’s satellite approximately according to our view.

Main Image creation, Depth and Size
Previous Digital recording media
If you found this post useful and want to support the continuation of my writing without intrusive advertising, please consider supporting. Your assistance goes towards helping make the content on this website even better. If you’d like to make a one-time ‘tip’ and buy me a coffee, I have a Ko-Fi page. Your support means a lot. Thank you!
 Since I started my first website in the year 2000, I’ve written and published ten books in the German language about photographing the amazing natural wonders of the American West, the details of our visual perception and its photography-related counterparts, and tried to shed some light on the immaterial concepts of quantum and chaos. Now all this material becomes freely accessible on this dedicated English website. I hope many of you find answers and inspiration there. My books are on