You are here: Nature Science Photography – Image creation, Depth and Size – Photographic space mapping
Further valuable rules for photographic image composition are derived from the monocular depth criteria, because the camera also only „sees with one eye“. These imaging factors are a great help in shaping the spatial effect of the image.
In order to use the criterion of occlusion to increase the depth effect in the picture, close parts of the subject should be placed in such a way that they overlap those further back in a clearly comprehensible way. The more clearly this is comprehensible in the picture, the stronger is our impression of depth. Usually a few steps to the side are enough to benefit from this depth criterion. Conversely, the conscious avoidance of overlapping can direct our attention specifically to one point and thus exert an equally strong visual stimulus.
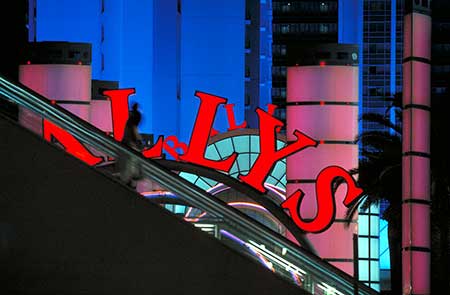
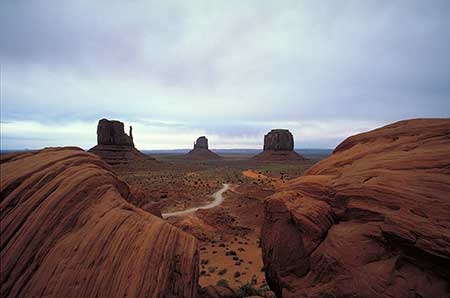
Relative size is about the fact that identical objects that are shown at different sizes appear to us to be different distances away. So if you include objects to which this applies in the composition, you enhance the impression of spatial depth. In landscape shots, trees are predestined for this. Using a wide-angle lens that enlarges the foreground enhances this effect, while a long focal length weakens it.
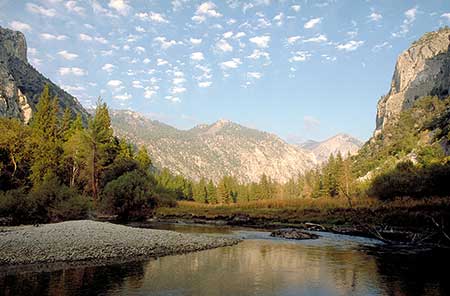
The shadow cast is a sure indication of the presence of three-dimensionality, physicality and spatial depth, because as we instinctively know it is not possible to create a shadow without placing a corresponding object between the light source and the illuminated surface. Uniform, diffuse lighting, on the other hand, awakens in us the idea of two-dimensionality. The more shadows, the more impressive the depth effect. We can convince ourselves of this in every backlight shot, and therefore the phrase „a lot helps a lot“ applies in this context as an exception. In nature, shadows are only cast when the sun is low in the sky, so we would do well to plan landscape shots for the morning/forenoon or afternoon/evening.
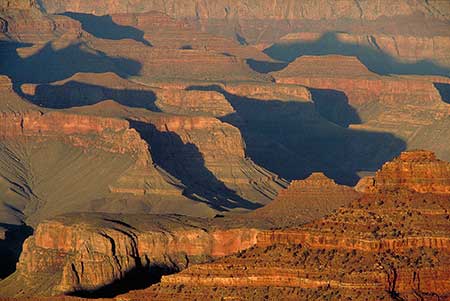
Atmospheric perspective, or aerial perspective, enhances our perception of distance and depth, since the scattering of light by atmospheric impurities makes distant objects appear brighter, blurrier, lacking in contrast, and shifted in color toward blue. From these preconditions, a whole chain of practical hints for increasing the depth effect in photography can be derived, which can be summarized as follows: If the impression of depth is to be enhanced, we must imitate the effects of aerial perspective. If, on the other hand, a distant object is to be imaged alone, we must avoid them.
Imitation means keeping to the sequence of light and dark given by aerial perspective. In principle, any light-dark contrast does create a sense of depth, but its effect depends on the distribution of brightness values. If this is uniform, for example when illuminated from the side, the objects will have a certain physicality, but a true spatial impression will be difficult to achieve. If the distribution is uneven with a bright foreground and a dark background, as is usually the case with flash shots due to the light falling from front to back, the result is almost unnaturally flat-looking images. Only with the distribution of brightness values oriented to aerial perspective, which makes distant objects appear bright and nearby objects appear dark, can we create images that give a credible impression of spatial depth. The easiest way to meet this requirement is with backlight situations. The backlighting that accompanies it ensures that the near sides of the object facing the camera are dark and their far sides are bright.
Unfortunately, not all objects are suitable backlight subjects and therefore we have to reach into the bag of tricks at one point or another to create shots with real depth effect. We can help a wide and often slightly hazy landscape with a few dark foreground objects (more on their optimal color below), such as rocks, trees, or exciting silhouettes. To increase this positive light-dark contrast a bit more, you can calmly orient the exposure to the distant bright parts of the landscape and thus let the foreground „drown“ a bit. Interior shots should also be arranged in such a way that the daylight coming in through the windows does not fall directly on the objects of the interior decoration that are close to the camera, but mainly on those that are further away from it. Evening and night shots in urban areas with naturally high levels of artificial light work well with thin fog or haze. Their presence mimics aerial perspective even at short and medium distances and provides a comprehensible separation of buildings, vehicles and pedestrians at different distances from each other.
In addition, they ensure that the light from the lanterns and neon signs virtually makes the air itself glow. If these elements are missing in areas with clear, dry air, the spaces in between appear uniformly black and the spatial separation is missing.
Conversely, when shooting distant objects and landscapes with a telephoto, the suggestion of depth is not necessary because the subjects appear full-frame in the image. The point here is to eliminate aerial perspective to a large extent. On the technical side, we can counteract the „bluing“ of distant objects with a KR 1.5 or KR 3 color correction filter and combat their diminishing sharpness with UV and polarizing filters. However, it is not possible to completely eliminate the effect of atmospheric perspective and restore the colors of the objects affected by it. So we can either give in and accentuate the cool blues with warmer reds and yellows in a foreground to be included, or wait for a really clear day. Storms and heavy rain showers rid the atmosphere of the impurities that are largely responsible for scattering and provide unclouded distant views.
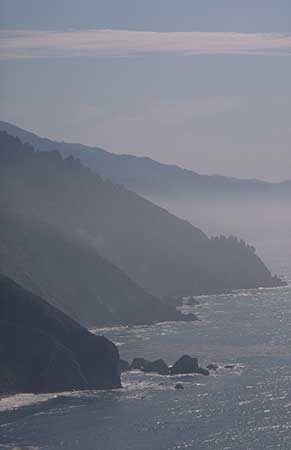
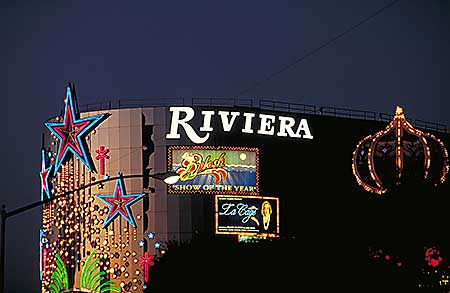
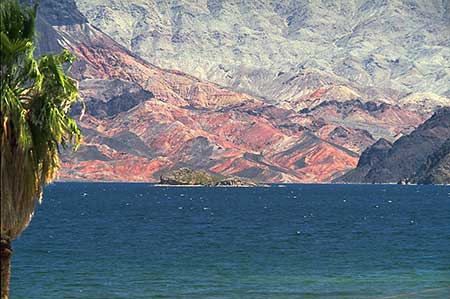
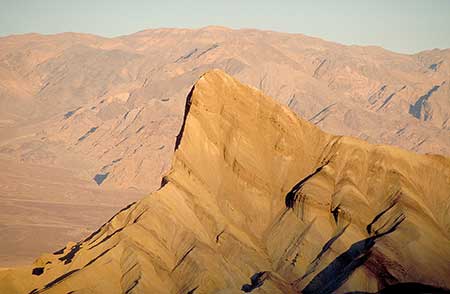
Color values are also a good indicator of depth due to a physiological feature. This clue is called color perspective and states that we perceive the yellow-red, rather warm colors as brighter and thus prominent, while the colder green-blue tones are darker and recessed. In order to implement the color perspective optimally, warm colors (yellow, orange, red, brown) should dominate in the foreground, the middle distance area should be dominated by green tones, and blue tones should predominate in the background of the shot. At this last position, the blue cast associated with the atmospheric perspective also works very well. If this aspect is included in the image composition, at least as a contrast between warm and cold colors in the foreground and background, this not only enlivens the image in a way that is pleasant for us, but also sustainably increases the impression of spatial depth in the image.
The criterion of focus makes use of the fact that for us the difference between objects in and out of focus also plays a role in the construction of spatial depth. Photographically, we can take advantage of this by selectively focusing on a main subject and blurring the background. A lens with a large initial aperture and resulting shallow depth of field facilitates this focusing „to the point“ by blurring everything in front of and behind the main plane of focus. The longer the focal length used, the larger the aperture selected, and the shorter the shooting distance, the greater will be the difference between sharp and blurred in the image, and the more impressive will be the impression of depth. By thoughtfully tuning these factors, you can precisely control the depth of field and make the room appear deeper or shallower according to your vision. This is especially important when you’re dealing with objects that vary in distance but are similar to each other in color. In such cases, the use of selective sharpness is an extremely practical means of ensuring a comprehensible spatial separation of the subject parts. Because of the color conversion into similar gray scales, this means is often used in b&w photography.
The stop-down button is a great help in assessing the zone of sharpness. The effect is further enhanced if the subject has the narrowest possible transition zones between sharp and blurred and is thus separated from the background as much as possible. In contrast to a continuously sharp image, this achieves by far the strongest depth effect.
Because sharpness and blurriness are also a measure of importance and unimportance for us, selective sharpness can also be used beyond increasing the depth effect to control the attention of the image viewer. By selectively placing the plane of focus, we can free our main subject from a potentially distracting background and thus emphasize its importance.

Shaping space with planes is a possibility that does not directly belong to the imaging factors derived from the monocular depth criteria. Image planes are layers that represent clearly defined distance areas. Their simplest division divides the image into an area in front of the main subject, the area around the main subject, and an area behind the main subject. Analogously, we can also describe this as foreground, middle ground and background. Now, of course, every image has this division somehow, but in order for the image planes to spark the right effect, they must be clearly separated from each other in order to be clearly recognized by the viewer. To ensure this, we have the following options.
We can provide the motif with a kind of frame. Foreground objects such as trees, prominent branches, archways, or window vistas are particularly suitable for this. However, pay attention to the exposure range, because in backlit situations, the shadow area can quickly exceed the permissible level.
We can work with selective sharpness and separate the three image planes by the sequence blurred, sharp, out of focus (or vice versa). Of course, when using a wide-angle lens, we have to be very close to the foreground to get it out of focus because of the focal length’s inherent large depth of field. Also to be considered is the general mood of the image, on which sharpness and blur also have a strong influence. Sharpness throughout tends to promote coldness and a negative, forbidding mood, while blurring tends to idealize and romanticize, giving the image a lovely mood.
We can work with the colors and textures of the subject and fill the layers, each of which, by the way, should fill about 1/3 of the image height, each with visually opposite tones and patterns. This can be a striking structure, a special light effect (a lot of light, a lot of shadow), a person or even opposite brightnesses. Any combination that stands out well at first glance will do, and the main subject can be in any layer. This then simultaneously satisfies the requirement for a separate attention-grabber in each layer.
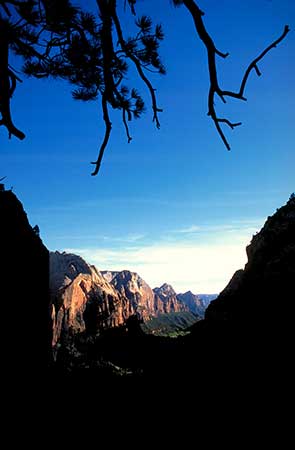
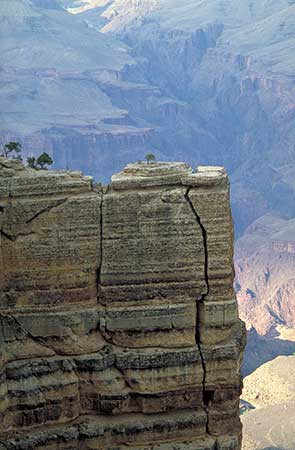
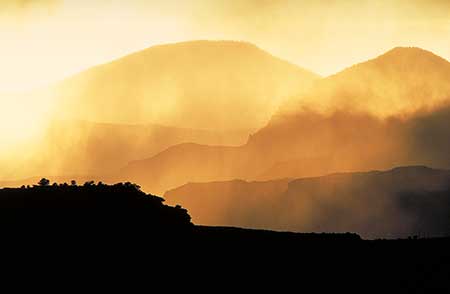
Keep in mind, however, that creating effective image planes can be difficult when using strong or extreme wide-angle lenses. Foreground objects will quickly appear distorted due to the strong perspective distortion at short shooting distances. The middle ground will often suffer from the small magnification and appear unrecognizably small.
But even if you incorporate as many of these depth criteria as possible into your composition, the image may be missing something crucial to conveying the sense of space. Often enough, this is a scale of size that allows you to realistically capture the dimensions. Because size is a property that, unless the photograph is taken on a scale of 1:1, can no more be reproduced directly in the image than spatial depth. Most of the time, we can only suggest it symbolically by means of just one possibility of comparison. For example, if an object of unknown size is photographed together with an object of the usual size, it is usually possible to increase the depth effect of the image and to create an unobtrusive possibility of comparison.

If we place something like a house in the foreground of a shot of a distant mountain, we know that the house is actually much smaller than the mountain and that there must be a corresponding spatial distance between the two. Moreover, we have given the photograph a reliable scale of size. Another variation: the height of a redwood tree native to California can be emphasized by juxtaposing it with a smaller and more familiar Douglas fir, which at the same time makes its enormous dimensions comprehensible. Other authoritative things to be easily classified by any viewer may include a car, a horse, trees and shrubs, or the human figure. What is so often used for the vertical can be applied analogously to the horizontal, as the figure 59 (scale) shows. – A wide landscape like the Grand Canyon becomes comprehensible only with a scale which is comprehensible for us.
But we have to make sure that the scale is small enough to make what is compared to it appear large. Imagine the person in the Figure … (scale) would be closer to the camera and pictured larger. Would this result in an increased depth and size effect of the landscape? Probably not, because it is precisely the fact that he seems so lost that creates the impression of infinite expanse. By controlling the size of the object used for comparison, we can directly influence the spatial impression of our image.
Next Control and correction of the central perspective
Main Image creation, Depth and Size
Previous Direction of view
If you found this post useful and want to support the continuation of my writing without intrusive advertising, please consider supporting. Your assistance goes towards helping make the content on this website even better. If you’d like to make a one-time ‘tip’ and buy me a coffee, I have a Ko-Fi page. Your support means a lot. Thank you!


 Since I started my first website in the year 2000, I’ve written and published ten books in the German language about photographing the amazing natural wonders of the American West, the details of our visual perception and its photography-related counterparts, and tried to shed some light on the immaterial concepts of quantum and chaos. Now all this material becomes freely accessible on this dedicated English website. I hope many of you find answers and inspiration there. My books are on