

You are here: Nature Science Photography – Visual acuity – Image sharpness III
Digital images necessitate constant sharpening, unlike analog images where unsharp masking is optional. This is due to two factors inherent in the nature of image sensors. They consist of pixels arranged side by side and one above the other, each measuring the light at a small point on the sensor. Furthermore, with the exception of the Foveon sensor, they always determine only one color, red, green or blue, at one point. Figure 57 (Bayer pattern) shows the arrangement of pixels on such a sensor.
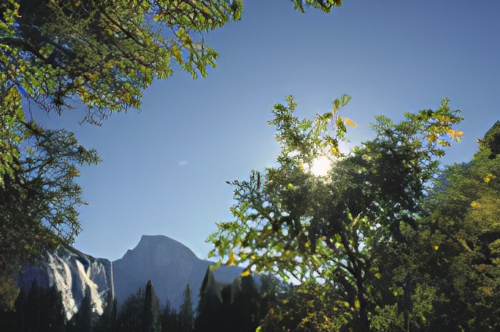
Figures 58 and 59 illustrate what the subdivision of the image into pixels means for the edges. Point 1 in figure 58 on the leaf side of the edge is yellow. Point 2 on the background side is black. Point 3 is exactly on the edge. How the sensor pixels pick up these points is shown in figure 59. Pixel 1 receives yellow light from point 1 and registers it correctly as yellow. Pixel 2 receives little or no light from the dark background and also registers this correctly as black. Pixel 3, situated precisely on the edge, receives half of the yellow light from the leaf and the other half receives little or no light from the dark background. Unfortunately, the pixel can only display a single color tone, not a gradation between yellow and black. For this reason, it registers gray. Unlike us, who see a clearly defined yellow-black edge, the sensor sees a softer yellow-gray-black edge. So its pixel nature has lowered edge sharpness.
The second reason is related to the way digital technology recovers color. As already mentioned, pixels are actually colorblind and only register brightness values. With the help of filters placed over the sensor, they are made sensitive to that part of the spectrum that corresponds to the respective primary color, red, green or blue. The software that does the subsequent processing knows which pixel is fitted with which filter and can thus assign it the correct color value. To do this, however, it not only looks at this pixel itself but also takes into account the brightness values of its neighbors, which inevitably have other color filters, and calculates an average value for it from this. We refer to this process as Bayer interpolation, which has the ability to lessen the sharpness of edges where color transitions take place. For example, where we see a clear transition between green and blue, the interpolation will usually calculate an intermediate color, thus making the edge less sharp. For these two reasons, sharpening digital images is absolutely necessary, and the unsharp mask filter is one of several ways to achieve this.
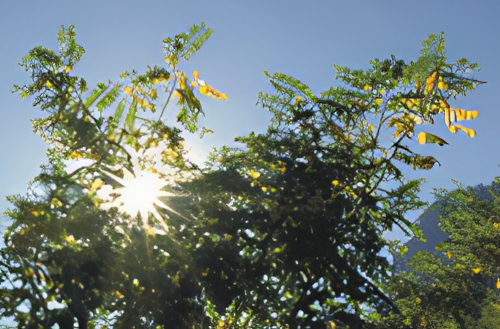
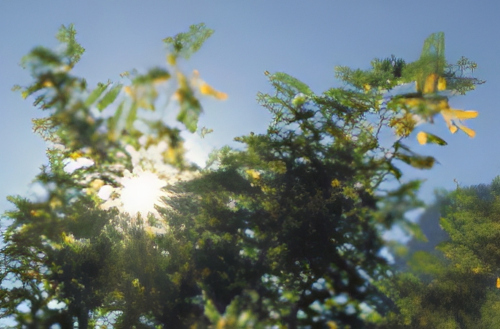
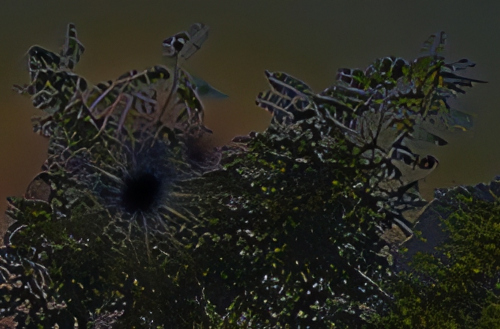
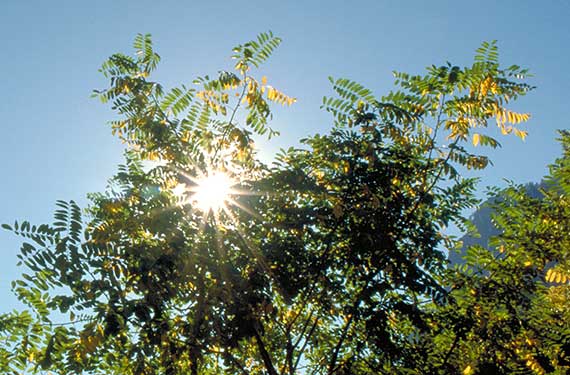
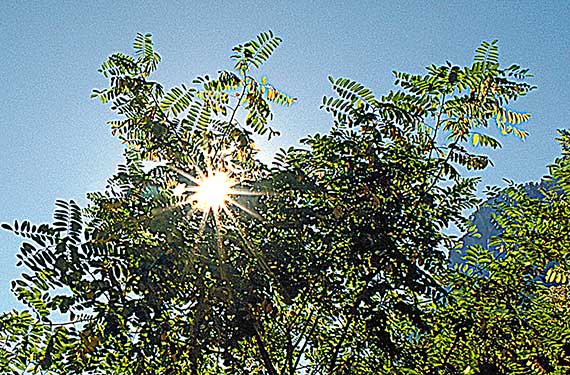
The unsharp masking filter in digital image processing essentially performs the same function as the previously described variant from the wet darkroom: it enhances the contrast between adjacent areas to sharpen the edges. The first problem the algorithm has to master is determining the edges between the objects. In our example image in figure 60, it must find out which pixel belongs to a border and which does not. To achieve this, it operates in the same manner as you would in an analog darkroom. It creates a copy of the image in the RAM and applies the Gaussian blur filter to it (figure 61). It then compares the original and copy pixel brightnesses and subtracts them. The brighter the image areas in figure 62 are (or the larger the subtraction result is), the larger is the difference between original and copy there (or the closer the pixel is to an edge).
After the filter knows where the edges are, it must correctly adjust the brightness on both sides. This is always done proportionally to the contrast already present. Therefore, the sharpening process does not affect a uniform image area, but it significantly affects a high contrast area. You determine the exact procedure via the input dialog of the unsharp mask filter. There you can specify three parameters with Strength, Radius and Threshold and see the effects in the preview window.
Sharpening should be the last step in digital image processing. For this reason, you would be better off doing it yourself with careful consideration rather than leaving it to your digital camera.
The Strength (1 to 500%) determines how much edge contrast is added and how much apparent sharpness you get. It controls how much the brightness of the dark areas is lowered and how much the bright areas are raised. If the input value is too low, no change is noticed. If the input value is excessively high, the sharpened image displays the inverse bright halos of the mask, giving it an artificial appearance.
The radius (0.1 to 255 pixels) determines how much blur is applied in the edge-finding process with the Gaussian blur filter, i.e., how sharp or blurry the mask turns out to be. Practically, the value corresponds to the width of the halos or the size of the darkened/brightened area that the mask generates. Choosing a larger value will increase the potential brightness difference and consequently the filter’s effect. Unsharp masking with a strength of 150 and a radius of 3 pixels will therefore have a more lasting effect on the image than a setting of 150 and 0.3. In other words, the smaller the radius, the greater the strength must be selected in order to achieve the same effect. Therefore, selecting a larger value essentially results in a more noticeable sharpening effect. However, the shape of the halo also depends on the nature of the subject and the contrast already present.
The Threshold Value (0 to 255 levels) determines how large the difference in brightness between the pixels of the original and the blurred copy must be for the brightness increase or decrease to take effect there. This allows you to exclude incidental details from sharpening and reserve the effect for those areas of the image that should actually stand out. You could also say that the parameter separates the signal from the noise. If you set its value too low, it will sharpen every edge and every change in tone value, including the film grain. Conversely, if you set it too high, it doesn’t consider transitions as edges and doesn’t undergo any sharpening.
Other undesirable side effects of incorrect setting values are aliasing (suppression of fine details at the level of individual pixels and the resulting more visible staircase formation) and increased image noise. Figures 64, 65, 66 and 67 show how it should and should not be. The first image shows part of the unsharpened original. The section exhibits almost optimal sharpening, meaning the artifacts do not stand out disturbingly. The third, oversharpened with a very small radius, reveals an unsightly hard staircase. In the last image, you can see the classic oversharpening with too large a radius and too high a strength, resulting in clearly visible halos. The last two sections show particularly well how the radius setting affects the appearance of the artifacts.


Since the radius is the central variable in unsharp masking, you should start with it. An image that has a lot of fine details needs a lower radius setting than one with less fine structures. Start with values between 1.0 and 1.5 and decrease the setting to perhaps 0.5 for a finely drawn image, or increase it to 2.0 or 4.0 for a coarsely textured image. If you can get by with a small radius due to the nature of the image, the halos will be narrow, and you will need a large strength setting to make an impact. On the other hand, if you use a large radius, the halos will appear wider, and it’s important not to increase the strength excessively to avoid them becoming too noticeable. After you’ve adjusted the radius and strength to your satisfaction, lower the threshold until the grain, noise, or other artifacts begin to stand out, and raise it again very gently from that point.
Adjustment sequence: Keep the radius as small as possible, raise the strength until the image looks good, and then raise the threshold exactly to that point where the sharpening effect is removed again.
While the optimal input values depend heavily on the specifics of the image in question and the output medium (especially its resolution and size), I won’t deprive you of a few workable starting values. For an image with 300 ppi resolution, radius values between 1.2 and 2.0 have proven useful. The thickness should be between 80 and 200. In general, scanned images from slides need higher thresholds than directly digitally captured images to suppress film grain. Noise is no longer very noticeable with digital cameras these days. Basically, what looks minimally oversharpened in the 50% view will be fine in print or exposure.
In conclusion, although unsharp masking is not a bad way to process digital image data, it also has some system-related disadvantages that are worth mentioning:
- USM sharpens the whole image uniformly in one go. However, the various details in photos place varying demands on sharpening. A setting that brings out fine details just right will be too weak for less detailed picture elements and too strong for still others. Therefore, the blanket method sharpens the image incorrectly, too little, and too much at once.
- In images with noticeable noise, this unwanted component is also sharpened by USM and appears worse afterwards than before. Of course, you can raise the threshold in such cases, but then you automatically lose other fine image details.
- The demands that the image places on sharpening often clash with those of the output devices. For instance, you should carefully handle images with intricate details using USM to avoid oversharpening them. However, you also want to output the file in a large format, which necessitates a higher level of sharpening.
- USM can cause unwanted color fringing around sharpened edges.
- Any sharpening method is destructive and, strictly speaking, degrades image quality. However, the damage caused by USM is irreversible and cannot be undone in the future when attempting to adapt the image to a different format or output medium.
The digital world would not be what it is, however, if it had not devised other procedures that more or less avoid the disadvantages described. There are now countless other sharpening options that can deliver better results in one case or another. Digital sharpening has developed into a kind of science of its own, and the possibilities published in numerous books are correspondingly diverse.
Main Visual acuity
Previous Greater edge sharpness through analog unsharp masking
If you found this post useful and want to support the continuation of my writing without intrusive advertising, please consider supporting. Your assistance goes towards helping make the content on this website even better. If you’d like to make a one-time ‘tip’ and buy me a coffee, I have a Ko-Fi page. Your support means a lot. Thank you!
 Since I started my first website in the year 2000, I’ve written and published ten books in the German language about photographing the amazing natural wonders of the American West, the details of our visual perception and its photography-related counterparts, and tried to shed some light on the immaterial concepts of quantum and chaos. Now all this material becomes freely accessible on this dedicated English website. I hope many of you find answers and inspiration there. My books are on